
You paddle back out after a clean wave, only to spot a fresh white crack near your rail. Your heart sinks. Epoxy boards are lighter and more buoyant than polyester, but they still take damage from fins, rocks, and careless car racks. The good news? You can fix most dings at home in under an hour. The bad news? Using the wrong resin or skipping prep work turns a five-minute repair into a recurring headache. This guide walks you through the exact process to repair epoxy surfboard dings quickly, what supplies actually matter, and the mistakes that cause repairs to fail.
Why Epoxy Repairs Differ From Polyester Repairs
Epoxy surfboards use epoxy resin as the laminating and hot-coat material, which creates a tougher, more water-resistant shell than traditional polyester resin. That same toughness makes repairs trickier. Polyester resin will not chemically bond to an epoxy surface. If you use the wrong resin, the patch peels off within weeks, and water sneaks back into the foam core.
You need epoxy resin designed for surfboard repairs, not the polyester resin sold at most hardware stores. Epoxy resin also cures with less shrinkage and creates a stronger mechanical bond. It does take a bit longer to cure, but the durability payoff is worth the extra wait.
What Happens When You Use the Wrong Resin
Using polyester resin on an epoxy board creates a weak chemical bond. The patch may look fine for a few days, but thermal expansion and flexing while surfing cause the repair to separate. Water then migrates through the crack and saturates the foam core, turning a small ding into a delamination problem that requires cutting out large sections of the blank.
Assess the Damage Before You Start
Not every ding needs the same treatment. A shallow surface scratch only requires a thin coat of resin. A deep gouge that exposes the foam core needs a full fill and possibly fiberglass cloth for structural strength. A cracked rail with a soft spot underneath means the foam has already absorbed water, and you need to let it dry completely before sealing.
Press gently around the damaged area. If the foam feels spongy or looks darker than the surrounding area, moisture has already penetrated. Squeeze out any water you can, then let the board sit in a warm, dry place for 24 to 48 hours before repairing. Sealing water inside the board guarantees future delamination.
Quick Damage Classification Guide
| Damage Type | Visual Signs | Repair Approach |
|---|---|---|
| Surface scratch | White mark, no foam visible | Light sand, apply thin resin coat |
| Small ding | Foam exposed, no cracks radiating | Fill with epoxy resin, sand flush |
| Deep gouge | Foam compressed or missing | Fill with resin, add fiberglass patch |
| Cracked rail | Soft spot, water visible | Dry thoroughly, fill, reinforce with cloth |
Essential Supplies for Epoxy Ding Repair
Having the right tools on hand makes the difference between a quick fix and a frustrating afternoon. You do not need a full shaping bay, but a few specific items are non-negotiable.
- Epoxy resin and hardener: Buy a surfboard-specific epoxy repair kit. These come with the correct mixing ratios and cure times.
- Fiberglass cloth: Use 4-ounce or 6-ounce fiberglass for structural repairs. Lighter cloth works for small dings, heavier cloth for rail damage.
- Sanding paper: 80-grit for rough shaping, 120-grit for smoothing, and 220-grit for final finishing.
- Mixing cups and stir sticks: Disposable items prevent contamination and make cleanup simple.
- Razor blade or utility knife: Use this to trim excess cured resin and cut fiberglass cloth.
- Acetone or denatured alcohol: Clean the damaged area before applying resin.
- Gloves and respirator: Epoxy fumes are no joke. Work in a ventilated area.
If you are looking for a complete kit with everything pre-measured and ready to go, many surfers find that the best way to repair epoxy surfboard dings is to start with a quality repair kit rather than sourcing individual supplies. Kits take the guesswork out of resin ratios and often include sandpaper and mixing tools.
Step-by-Step: How to Repair Epoxy Surfboard Dings
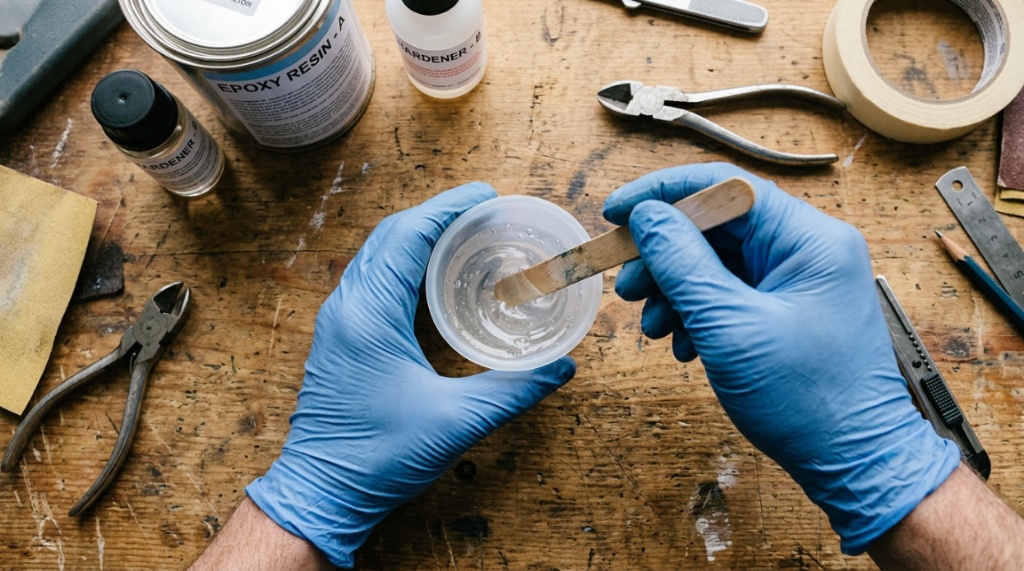
Follow these steps in order for a clean, durable repair. Work in a shaded, warm area. Direct sunlight speeds up curing too fast and causes bubbles.
Step 1: Prepare the Damaged Area
Sand the area around the ding with 80-grit paper. Remove any loose fiberglass, wax, or paint. Feather the edges so the repair blends smoothly into the surrounding surface. Wipe the area clean with acetone to remove dust and any residual wax or grease.
Step 2: Mix the Epoxy Resin
Read the manufacturer instructions on your resin kit. Most epoxy resins mix at a 2:1 or 1:1 ratio by volume. Measure carefully. Mix thoroughly for at least two minutes, scraping the sides and bottom of the cup. Improper mixing leaves soft spots that never cure properly.
Step 3: Fill the Ding
For small dings, apply the mixed resin directly into the cavity with a stir stick or small brush. Overfill slightly, since epoxy shrinks a little as it cures. For deep gouges, apply resin in layers, letting each layer partially cure before adding the next. This prevents heat buildup and excessive bubbling.
Step 4: Apply Fiberglass Cloth for Structural Damage
If the ding is larger than a quarter or affects the rail, cut a piece of fiberglass cloth slightly larger than the damaged area. Wet the area with resin, lay the cloth over it, and saturate the cloth with more resin using a brush. Press out air bubbles with a plastic spreader or your gloved finger. Let it cure completely, Proper board care extends beyond quick fixes—learn how to Balance Performance and Sustainability in Recycled Surfboard Fins to complete your eco-friendly setup.
Step 5: Sand the Repair Flush
Once the resin is fully cured, sand the repair with 120-grit paper to level it with the surrounding surface. Then switch to 220-grit for a smooth finish. Be careful not to sand through the surrounding hot coat. Wet sanding with a little water helps prevent clogging and gives a smoother result.
Step 6: Apply a Final Hot Coat
Mix a fresh batch of resin and apply a thin layer over the sanded repair. This seals any pinholes and creates a watertight barrier. Let it cure, then sand lightly with 220-grit to blend the edges. The repair is now ready for the water.
Common Mistakes That Ruin Epoxy Ding Repairs
Even experienced surfers make these errors. Avoid them and your repair will last as long as the original board.
Skipping the Drying Phase
Moisture is the enemy of any epoxy repair. If the foam is wet, the resin will not adhere properly, and the water will continue to spread beneath the repair. Always dry the board thoroughly before applying resin.
Using Hardware Store Epoxy
General-purpose epoxy from a hardware store is not formulated for the flex and UV exposure of a surfboard. It cures too brittle and turns yellow quickly. Surfboard-specific epoxy resin includes UV inhibitors and stays flexible enough to handle board flex without cracking.
Rushing the Cure Time
Epoxy takes longer to cure than polyester. If you sand or surf the board before the resin fully hardens, the repair will be soft and weak. Follow the manufacturer cure times, and when in doubt, wait an extra hour.
Mixing Too Much Resin at Once
Epoxy generates heat as it cures. Mixing a large batch at once causes it to heat up rapidly and cure too fast, creating bubbles and a brittle result. Mix small batches and work quickly.
How Long Should You Wait Before Surfing?
Most epoxy repair kits reach a sandable hardness in 4 to 6 hours at room temperature. Full structural cure takes 24 hours. If you want the repair to last, wait the full 24 hours before surfing. Surfing earlier risks flexing the repair while the resin is still slightly soft, which weakens the bond and creates micro-cracks that let water in later.
Temperature matters. Colder conditions slow the cure significantly. If you are repairing in winter or in a cool garage, expect longer cure times. You can speed things up by working in a warm room or using a heat lamp, but never apply direct heat to uncured resin, as this causes bubbling.
When to Call a Professional
Some damage is beyond a quick home repair. If the ding is larger than your fist, if the stringer is cracked, or if the board has significant delamination across a large area, a professional repair shop has the tools and experience to restore the board properly. Professional repairs cost more, but they are cheaper than replacing a board.
Also, if you are repairing a board you plan to sell or compete on, a professional finish will look much cleaner than a home repair. Cosmetic quality matters in those situations.
Preventing Future Dings
Prevention is always easier than repair. Use board bags with padding when transporting your board. Avoid stacking boards directly on top of each other without protection. Be mindful of fin impacts when walking in the parking lot. And check your board regularly for small cracks before they turn into waterlogged disasters.
A small ding that gets fixed immediately takes 30 minutes. The same ding left unattended for a month can require cutting out a section of foam, replacing the blank, and re-laminating the entire area. The math is simple.
Frequently Asked Questions
Can I use polyester resin on an epoxy surfboard?
No. Polyester resin does not chemically bond to epoxy surfaces. The repair will fail quickly, and water will re-enter the board. Always use epoxy resin for epoxy surfboard repairs.
How long does epoxy resin take to dry on a surfboard?
Most epoxy repair resins reach a sandable state in 4 to 6 hours at room temperature. Full structural cure takes about 24 hours. Wait the full 24 hours before surfing for the strongest repair.
Do I need fiberglass cloth for every ding?
No. Small dings that do not affect the structural integrity of the board only need resin filler. Use fiberglass cloth for dings larger than a quarter, rail damage, or any area that flexes significantly.
Why does my epoxy repair keep cracking?
This usually happens when the resin is too brittle, the repair was sanded too thin, or the board was surfed before full cure. Use surfboard-specific epoxy, apply a proper hot coat, and wait the full cure time.
Can I repair a ding while the board is wet?
No. The foam must be completely dry before applying resin. Water trapped under the repair will cause delamination and spread the damage. Dry the board for 24 to 48 hours in a warm place first.
Conclusion
Repairing epoxy surfboard dings quickly comes down to three things: using the right resin, preparing the surface properly, and waiting for a full cure. Skip any of those steps and you will be redoing the repair within a month. Keep a repair kit in your car or garage, fix dings as soon as you spot them, and your board will last years longer than one that gets neglected. A 30-minute repair now saves you a $500 board replacement later.