
To fix most van heater issues, check coolant level, airflow, thermostat operation, fuses, and heater controls first. Boulder winters can push heating systems hard, especially when temperatures fall below freezing. Denver climate records show winter nights can reach the low teens, while snowfall can add extra strain. If you enjoy winter road trips with top rated campervans for couples, reliable cabin heat becomes essential for comfort and safe visibility.
Start With A Fast Heater Symptom Check
Before replacing parts, identify exactly how your van heater behaves. A heater that blows cold air needs different checks than one that produces no airflow.
First, start the engine and let it reach normal operating temperature. Then set the heater to maximum temperature and switch the blower through each speed.
If airflow feels strong but remains cold, inspect the coolant system and heater core. If airflow stays weak, focus on the blower, cabin filter, vents, or electrical controls.
Also notice whether the engine temperature gauge reaches its usual position. A slow warming engine can point toward thermostat or coolant circulation problems.
Keep a simple symptom list before troubleshooting further:
- Cold air from every vent
- Weak airflow at every speed
- Heat works only while driving
- Heat changes between hot and cold
- Blower works on selected speeds only
- Windshield defroster performs poorly
- Coolant level repeatedly drops
This quick check can prevent unnecessary parts replacement. It also gives a technician useful information if professional diagnosis becomes necessary.
Check Coolant Before Blaming The Heater
Low coolant ranks among the first things to investigate when an engine heated system stops producing warm air. However, never remove a coolant cap from a hot engine.
Park safely, switch the engine off, and allow the cooling system to cool completely. Then inspect the reservoir against its marked level.
If the coolant sits below the recommended mark, look for visible leaks before adding the correct coolant. Check hoses, connections, the radiator area, and the ground beneath the van.
Manufacturer service guidance commonly starts heater diagnosis by verifying coolant level. One current GM bulletin also advises checking coolant before deeper heater troubleshooting.
Do not keep driving with unexplained coolant loss. A small leak can become an overheating problem, creating much greater engine damage.
For broader vehicle ownership decisions, understanding negotiate a car lease can also help when comparing repair costs against replacement options.
Look For These Coolant Warning Signs
Sweet smelling odors inside the cabin can indicate a coolant leak near the heater core. Damp carpeting can also signal coolant entering the passenger compartment.
Meanwhile, visible steam from the engine bay deserves immediate attention. Stop driving if the temperature gauge enters the overheating range.
Inspect The Thermostat And Engine Warmup
A thermostat helps control engine coolant temperature, which directly affects cabin heating performance. If it remains open, the engine may struggle to reach normal operating temperature.
Watch the temperature gauge during a normal drive. If the gauge stays unusually low after sufficient driving, ask a technician to test thermostat operation.
However, do not replace the thermostat based only on slow warmup. Modern vehicles use electronic monitoring, and manufacturer procedures may require diagnostic testing first.
Cold Boulder weather can naturally extend engine warmup time. Therefore, compare your symptoms with the vehicle manufacturer’s normal operating behavior.
Also consider driving conditions when diagnosing weak heat. Long downhill sections can reduce engine heat production in some vehicles.
For example, a manufacturer bulletin explains that deceleration fuel cutoff can reduce additional engine heat during long descents.
If the engine reaches normal temperature but the cabin remains cold, continue toward heater core and air control checks.
Test The Blower Motor And Airflow System
A properly heated heater core cannot warm the cabin without sufficient airflow. Therefore, test the blower before assuming the heating system itself failed.
Turn the blower through every available speed. If only one speed works, inspect the blower resistor, control module, wiring, and related connectors.
If every speed fails, inspect the fuse, relay, blower motor power supply, ground connection, and control circuit. A dead blower often points toward an electrical fault.
Modern HVAC systems can also use electronic blower controls and feedback signals. Service documentation shows that some systems monitor blower speed electronically.
Check the cabin air filter if your van uses one. A heavily restricted filter can reduce airflow and make the heater feel ineffective.
Then inspect the dashboard vents for leaves, debris, or objects blocking airflow. Remove only accessible debris without damaging internal HVAC components.
If you recently experienced a collision or body repair, inspect the HVAC controls and wiring carefully. Related vehicle problems can sometimes appear after electrical or dashboard work, so avoid costly car accident mistakes during repairs.
Check The Heater Core For Restricted Heat
The heater core transfers engine coolant heat into the cabin airflow. Restricted coolant flow can therefore create weak or inconsistent cabin heat.
A technician can compare heater hose temperatures to assess coolant movement through the core. Significant temperature differences can indicate restricted flow or circulation problems.
However, heater core diagnosis requires caution because coolant can become extremely hot. Let the engine cool before touching hoses or cooling system components.
A clogged heater core may require professional flushing or replacement. Avoid aggressive flushing methods unless your vehicle manufacturer permits them.
Recognize Possible Heater Core Problems
Several symptoms can point toward heater core trouble:
- Cold cabin air despite normal engine temperature
- Weak heat that improves with engine speed
- Coolant smell inside the cabin
- Fogging windows with an unusual sweet odor
- Damp passenger side carpeting
These symptoms do not prove heater core failure by themselves. A qualified technician should confirm the cause before replacing an expensive component.
Test Temperature And Mode Door Controls
Many vans use HVAC doors to control temperature and direct airflow. A failed actuator can leave the system stuck in the wrong position.
Move the temperature control slowly from cold to hot. Listen for unusual clicking, repeated tapping, or mechanical movement behind the dashboard.
Next, switch between floor, dashboard, and defrost modes. If airflow never changes location, a mode door or actuator may have failed.
Some modern HVAC systems use electronically controlled actuators and communication networks. Service documentation identifies temperature, mode, and recirculation doors as separate controlled components.
Do not force a stuck control knob. Excessive force can damage the control mechanism and increase repair costs.
Protect Defrost Performance During Boulder Winters
A van heater does more than keep passengers warm. It also supports windshield defrosting and visibility during cold weather.
Clear snow and ice from the windshield before driving. Never depend entirely on maximum heater output to remove thick exterior ice.
Use the defrost setting according to your vehicle’s instructions. Keep airflow directed toward the windshield when condensation begins forming.
Boulder area winter conditions can include significant snow and strong winds. The National Weather Service recommends close attention when winter weather produces hazardous road conditions.
If the defroster cannot clear interior fogging, stop somewhere safe. Poor visibility creates a safety risk that no travel schedule justifies.
Use Recirculation Carefully
Recirculation can help warm the cabin faster because the system reheats already warmed interior air. However, prolonged recirculation can increase interior humidity.
When windows begin fogging, switch to fresh air and use the defrost setting. Air conditioning may also help remove moisture on vehicles designed for combined defrost operation.
Check Fuses, Relays, And Electrical Connections
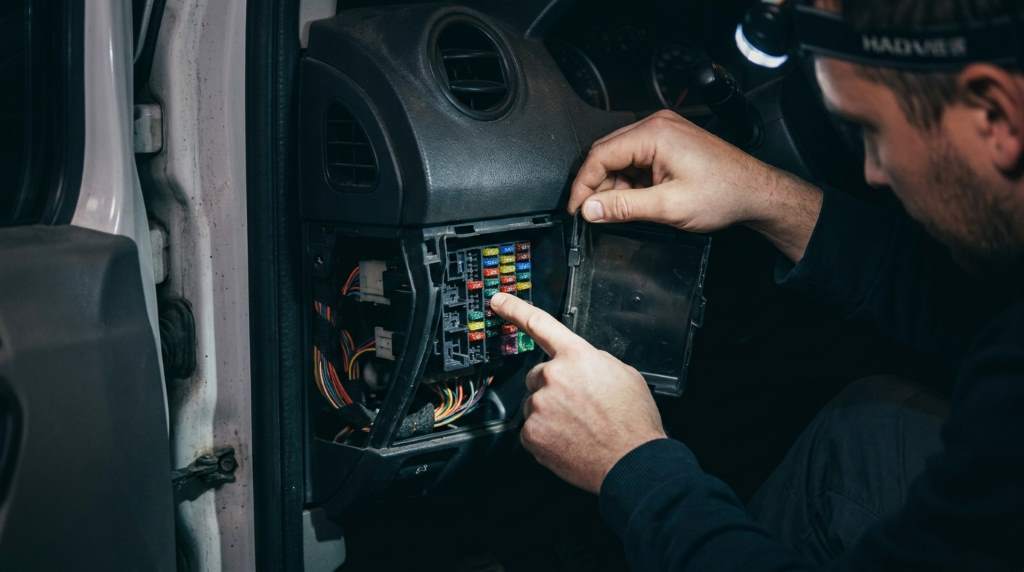
Electrical faults can disable blower motors, HVAC controls, actuators, or related sensors. Therefore, inspect the correct fuse before replacing expensive components.
Use the fuse chart provided for your specific van. Never install a fuse with a higher rating than the manufacturer specifies.
If a replacement fuse blows again, stop replacing fuses repeatedly. A recurring failure usually indicates an underlying short circuit or component problem.
Inspect accessible connectors for corrosion, loose terminals, damaged insulation, or signs of overheating. Professional electrical testing can identify faults hidden inside wiring harnesses.
Modern HVAC systems often integrate with body control modules and other electronic systems. Consequently, a diagnostic scan may reveal faults that basic visual inspection cannot find.
Know When DIY Heater Repair Should Stop
Basic checks can save time, but some heater problems require specialized equipment and experience. Cooling system repairs also involve hot fluids and pressure.
Stop troubleshooting yourself when coolant repeatedly disappears, the engine overheats, or the cabin develops strong coolant odors. These symptoms can indicate problems beyond a simple heater setting.
Professional diagnosis also makes sense when electronic HVAC components fail. A technician can use scan tools, electrical testing equipment, temperature measurements, and pressure checks.
Before approving repairs, request a diagnosis and written estimate. Ask which component failed and how the technician confirmed that failure.
That approach helps prevent unnecessary replacement of thermostats, blower motors, heater cores, or control modules.
Prevent Van Heater Problems Before Winter Trips
Preventive maintenance works better than waiting for cold weather to expose a weak heating system. Schedule inspection before your first major winter trip.
Start with the cooling system and inspect coolant condition, hoses, clamps, and visible leaks. Then verify that the engine reaches normal operating temperature.
Next, test every blower speed and HVAC mode. Finally, confirm that the windshield defroster produces adequate airflow and warm air.
Use this simple pre trip checklist:
- Check coolant level when the engine is cold
- Inspect hoses and connections
- Test every blower speed
- Check cabin filter condition
- Test floor, vent, and defrost modes
- Watch the engine temperature gauge
- Inspect windshield defrost performance
- Carry appropriate winter emergency supplies
Also keep the vehicle manufacturer’s recommended maintenance schedule. Regular cooling system service can reduce the chance of unexpected heating problems.
A Simple Boulder Van Heater Troubleshooting Order
When your heater fails, follow a logical sequence instead of replacing parts randomly. This approach keeps diagnosis faster and repair decisions more accurate.
- Confirm the engine reaches normal temperature.
- Check coolant level after the engine cools.
- Look for visible coolant leaks.
- Test every blower speed.
- Inspect the cabin filter and vents.
- Test temperature and airflow modes.
- Check fuses and electrical connections.
- Evaluate heater core coolant flow.
- Scan electronic HVAC systems for fault codes.
- Get professional diagnosis for unresolved problems.
This sequence starts with simple checks and gradually moves toward complex diagnosis. As a result, you can avoid spending money on parts that still work.
When A Van Heater Needs Immediate Attention
Some heater symptoms require immediate action rather than continued troubleshooting. Overheating, coolant leaks, and severe windshield fogging deserve particular attention.
Pull over if the engine temperature rises beyond its normal range. Continuing to drive can cause severe engine damage.
Likewise, stop if coolant leaks heavily or steam appears. Let the vehicle cool and arrange appropriate roadside assistance.
If the heater fails while driving during severe cold, prioritize safe shelter. Do not continue a remote trip simply because the vehicle still starts.
Conclusion: Restore Reliable Heat Before Your Next Trip
Fixing van heater issues starts with coolant, engine temperature, airflow, electrical components, and HVAC controls. In Boulder, winter conditions make reliable cabin heat especially important for comfort and visibility.
Start with simple inspections, then move toward professional diagnosis when symptoms remain unresolved. Most importantly, address coolant leaks, overheating, and defrost failures immediately.
Before your next mountain or winter road trip, test the complete heating system. A small inspection today can prevent a cold cabin and a stressful roadside repair tomorrow.
FAQs
Why does my van heater blow cold air?
Low coolant, thermostat problems, restricted heater core flow, or temperature door failures can cause cold air.
Why does my van heater work while driving?
Higher engine speed can improve coolant circulation and heat production when the system has an underlying problem.
Can low coolant stop cabin heat?
Yes, insufficient coolant can reduce heater core circulation and prevent the system from producing warm cabin air.
Why does my van heater smell sweet?
A sweet odor can indicate leaking coolant, including a possible heater core leak inside the cabin.
Should I repair my van heater myself?
Basic checks are reasonable, but cooling system leaks, electrical faults, and heater core repairs often require professional service.